
Certificates and vouchers are more than simple pieces of paper - they represent recognition and trust. In this guide, we’ll build a personalized PDF certificate generator in Node.js capable of producing print-ready PDFs with custom fonts and layouts.
You’ll learn how to:
✅ Load a PDF template and use it as a base
✅ Add personalized text (like names and dates)
✅ Use the Lato font for a professional look
✅ Generate text as vector outlines for perfect print results
✅ Expose the generator as both a CLI tool and a REST API
🧰 1. Project setup
Let’s start by initializing the project.
mkdir js-certificate-generator
cd js-certificate-generator
npm init -y
npm i pdf-lib @pdf-lib/fontkit opentype.js
Your project structure should look like this:
assets/
 ├─ template.pdf
 └─ fonts/
     ├─ Lato-Regular.ttf
     ├─ Lato-Bold.ttf
output/
src/
 ├─ generateCertificate.js
 ├─ cli.js
 └─ server.js
package.json
📎 You can download the sample certificate template used in this tutorial here:
Downloadtemplate.pdf
Place it inside your assets/ folder as shown in the structure above.
⚙️ 2. Project configuration
Your package.json should include the scripts and dependencies:
{
  "name": "js-certificate-generator",
  "version": "1.0.0",
  "main": "index.js",
  "type": "commonjs",
  "scripts": {
    "start": "node src/server.js"
  },
  "dependencies": {
    "@pdf-lib/fontkit": "^1.1.1",
    "opentype.js": "^1.3.4",
    "pdf-lib": "^1.17.1"
  }
}
Each dependency plays a specific role in our setup:
-
pdf-lib - the core library for creating and modifying PDF files in Node.js.
We use it to load thetemplate.pdf, draw text, and export the final personalized certificate. -
@pdf-lib/fontkit - enables custom font support inside
pdf-lib.
Without this plugin, you could only use built-in fonts like Helvetica or Times. -
opentype.js - parses
.ttfand.otffonts and lets us convert text into vector paths (SVG-like curves).
This approach ensures perfect rendering in print and makes your text resolution-independent.
In short:
pdf-lib handles the document, fontkit loads the fonts, and opentype.js turns text into perfect outlines.
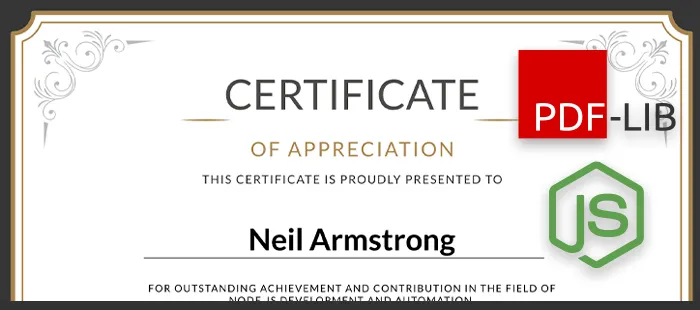
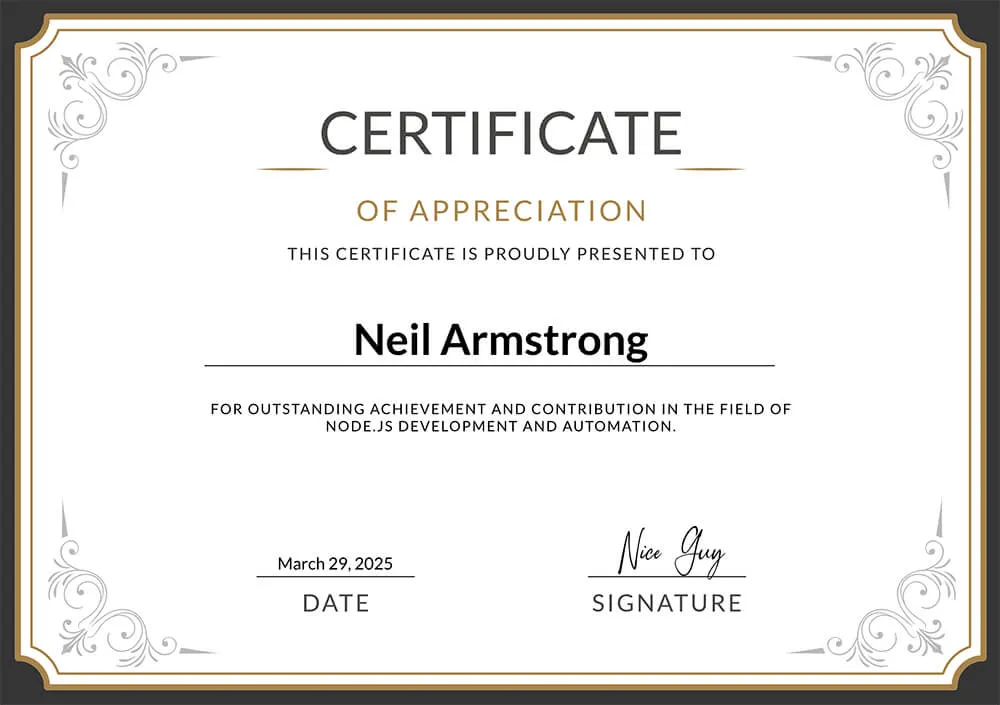
🖼️ Example output
Here’s what the final generated certificate looks like:
💡 Tip: You can open the generated
🧩 3. Core generator - generateCertificate.js
This file handles all the heavy lifting.
It loads assets (PDF + fonts), embeds them into a new PDF document, writes text as vector paths, and finally saves the personalized certificate.
🗺️ Overview: how the generator works
This simple flow shows the entire process:
Load your base PDF → Add custom fonts → Render names as vector text → Output a crisp, print-ready document.
3.1 Load and cache assets
We keep template and font files in memory for performance.
let _templateBytes = null
let _latoRegular = null
let _latoBold = null

let _otRegular = null
let _otBold = null

async function loadAssets() {
  const templatePath = path.join(__dirname, '..', 'assets', 'template.pdf')
  const latoRegularPath = path.join(
    __dirname,
    '..',
    'assets',
    'fonts',
    'Lato-Regular.ttf'
  )
  const latoBoldPath = path.join(
    __dirname,
    '..',
    'assets',
    'fonts',
    'Lato-Bold.ttf'
  )

  if (!_templateBytes) _templateBytes = await fs.readFile(templatePath)
  if (!_latoRegular) _latoRegular = await fs.readFile(latoRegularPath)
  if (!_latoBold) _latoBold = await fs.readFile(latoBoldPath)

  function bufferToArrayBuffer(buf) {
    return buf.buffer.slice(buf.byteOffset, buf.byteOffset + buf.byteLength)
  }

  if (!_otRegular)
    _otRegular = opentype.parse(bufferToArrayBuffer(_latoRegular))
  if (!_otBold) _otBold = opentype.parse(bufferToArrayBuffer(_latoBold))

  return {
    templateBytes: _templateBytes,
    latoRegular: _latoRegular,
    latoBold: _latoBold,
    otRegular: _otRegular,
    otBold: _otBold,
  }
}
The helper bufferToArrayBuffer() converts Node Buffers into ArrayBuffers, since opentype.js doesn’t accept raw Node Buffers.
3.2 Layout definition
To make the generator flexible, define coordinates for name and date:
const LAYOUT = {
  pageIndex: 0,
  name: {
    centerX: null, // defaults to page center
    centerY: 300,
    sizeMax: 36,
    minSize: 18,
    maxWidth: 500
  },
  date: {
    centerX: 282,
    centerY: 480,
    size: 14
  },
  color: rgb(0, 0, 0)
};
This allows you to quickly adjust the layout if your template changes.
3.3 Drawing text as vector paths
Instead of embedding fonts directly (which can sometimes cause rendering issues), we use opentype.js to generate paths from the text and draw them directly on the PDF using drawSvgPath.
This ensures:
- Consistent appearance across viewers
- Print-perfect scaling
- No need to re-embed fonts
You’ll implement two helpers:
drawOutlinedCenteredText()– draws fixed-size centered textdrawOutlinedCenteredAutoFit()– scales text down automatically if it’s too long
function drawOutlinedCenteredText(
  page,
  { otFont, text, centerX, centerY, size, color, baselineOffset = 0 }
) {
  const width = measureTextWidthOT(otFont, text, size)
  const x = centerX - width / 2
  const yPdf = centerY + baselineOffset
  const ySvg = page.getHeight() - yPdf

  const path = otFont.getPath(text, 0, 0, size, { kerning: true })
  const svgPath = path.toPathData(2)

  page.drawSvgPath(svgPath, { x, y: ySvg, color })
  return { x, y: yPdf, size, width }
}
function drawOutlinedCenteredAutoFit(
page,
{
otFont,
text,
centerX,
centerY,
sizeMax,
minSize,
color,
maxWidth,
baselineOffset = 0,
}
) {
let size = sizeMax
let width = measureTextWidthOT(otFont, text, size)
if (maxWidth) {
while (size > minSize && width > maxWidth) {
size -= 1
width = measureTextWidthOT(otFont, text, size)
}
}
const x = centerX - width / 2
const yPdf = centerY + baselineOffset
const ySvg = page.getHeight() - yPdf
const path = otFont.getPath(text, 0, 0, size, { kerning: true })
const svgPath = path.toPathData(2)
page.drawSvgPath(svgPath, { x, y: ySvg, color })
return { x, y: yPdf, size, width }
}3.4 The main function: generateCertificate()
This function orchestrates the entire generation:
- Validates input
- Loads and embeds fonts
- Draws the name and date
- Saves and returns the PDF bytes
/**
* @param {{ fullName: string, date?: string|Date, outPath?: string }} params
* @returns {Promise<Uint8Array>}
*/
async function generateCertificate(params) {
const fullName = (params?.fullName ?? '').trim()
if (!fullName) throw new Error('fullName is required')
const date = params?.date ?? new Date()
const outPath = params?.outPath
const { templateBytes, latoRegular, latoBold, otRegular, otBold } =
await loadAssets()
const pdfDoc = await PDFDocument.load(templateBytes)
pdfDoc.registerFontkit(fontkit)
const regular = await pdfDoc.embedFont(latoRegular, { subset: true })
const bold = await pdfDoc.embedFont(latoBold, { subset: true })
const page = pdfDoc.getPages()[LAYOUT.pageIndex]
drawOutlinedCenteredAutoFit(page, {
otFont: otBold,
text: fullName,
centerX: LAYOUT.name.centerX ?? page.getWidth() / 2,
centerY: LAYOUT.name.centerY,
sizeMax: LAYOUT.name.sizeMax,
minSize: LAYOUT.name.minSize,
color: LAYOUT.color,
maxWidth: LAYOUT.name.maxWidth,
})
const dateStr = formatDate(date)
drawOutlinedCenteredText(page, {
otFont: otRegular,
text: dateStr,
centerX: LAYOUT.date.centerX,
centerY: LAYOUT.date.centerY,
size: LAYOUT.date.size,
color: LAYOUT.color,
})
const bytes = await pdfDoc.save()
if (outPath) {
await fs.mkdir(path.dirname(outPath), { recursive: true })
await fs.writeFile(outPath, bytes)
}
return bytes
}At the end, export the function and layout:
module.exports = { generateCertificate, LAYOUT };3.5 Full source
Here’s the complete generateCertificate.js file, combining all the snippets from above:
const fs = require('fs/promises')
const path = require('path')
const { PDFDocument, rgb } = require('pdf-lib')
const fontkit = require('@pdf-lib/fontkit')
const opentype = require('opentype.js')
function formatDate(input) {
const d = new Date(input)
if (isNaN(d.getTime())) return String(input)
return d.toLocaleDateString('en-US', {
year: 'numeric',
month: 'long',
day: 'numeric',
})
}
let _templateBytes = null
let _latoRegular = null
let _latoBold = null
let _otRegular = null
let _otBold = null
async function loadAssets() {
const templatePath = path.join(__dirname, '..', 'assets', 'template.pdf')
const latoRegularPath = path.join(
__dirname,
'..',
'assets',
'fonts',
'Lato-Regular.ttf'
)
const latoBoldPath = path.join(
__dirname,
'..',
'assets',
'fonts',
'Lato-Bold.ttf'
)
if (!_templateBytes) _templateBytes = await fs.readFile(templatePath)
if (!_latoRegular) _latoRegular = await fs.readFile(latoRegularPath)
if (!_latoBold) _latoBold = await fs.readFile(latoBoldPath)
function bufferToArrayBuffer(buf) {
return buf.buffer.slice(buf.byteOffset, buf.byteOffset + buf.byteLength)
}
if (!_otRegular)
_otRegular = opentype.parse(bufferToArrayBuffer(_latoRegular))
if (!_otBold) _otBold = opentype.parse(bufferToArrayBuffer(_latoBold))
return {
templateBytes: _templateBytes,
latoRegular: _latoRegular,
latoBold: _latoBold,
otRegular: _otRegular,
otBold: _otBold,
}
}
const LAYOUT = {
pageIndex: 0,
name: {
centerX: null,
centerY: 300,
sizeMax: 36,
minSize: 18,
maxWidth: 500,
},
date: {
centerX: 282,
centerY: 480,
size: 14,
},
color: rgb(0, 0, 0),
}
function measureTextWidthOT(otFont, text, size) {
return otFont.getAdvanceWidth(text, size, { kerning: true })
}
function drawOutlinedCenteredText(
page,
{ otFont, text, centerX, centerY, size, color, baselineOffset = 0 }
) {
const width = measureTextWidthOT(otFont, text, size)
const x = centerX - width / 2
const yPdf = centerY + baselineOffset
const ySvg = page.getHeight() - yPdf
const path = otFont.getPath(text, 0, 0, size, { kerning: true })
const svgPath = path.toPathData(2)
page.drawSvgPath(svgPath, { x, y: ySvg, color })
return { x, y: yPdf, size, width }
}
function drawOutlinedCenteredAutoFit(
  page,
  {
    otFont,
    text,
    centerX,
    centerY,
    sizeMax,
    minSize,
    color,
    maxWidth,
    baselineOffset = 0,
  }
) {
  let size = sizeMax
  let width = measureTextWidthOT(otFont, text, size)

  if (maxWidth) {
    while (size > minSize && width > maxWidth) {
      size -= 1
      width = measureTextWidthOT(otFont, text, size)
    }
  }

  const x = centerX - width / 2
  const yPdf = centerY + baselineOffset
  const ySvg = page.getHeight() - yPdf

  const path = otFont.getPath(text, 0, 0, size, { kerning: true })
  const svgPath = path.toPathData(2)

  page.drawSvgPath(svgPath, { x, y: ySvg, color })
  return { x, y: yPdf, size, width }
}
/**
 * @param {{ fullName: string, date?: string|Date, outPath?: string }} params
 * @returns {Promise<Uint8Array>}
 */
async function generateCertificate(params) {
  const fullName = (params?.fullName ?? '').trim()
  if (!fullName) throw new Error('fullName is required')
  const date = params?.date ?? new Date()
  const outPath = params?.outPath

  const { templateBytes, latoRegular, latoBold, otRegular, otBold } =
    await loadAssets()

  const pdfDoc = await PDFDocument.load(templateBytes)
  pdfDoc.registerFontkit(fontkit)

  const regular = await pdfDoc.embedFont(latoRegular, { subset: true })
  const bold = await pdfDoc.embedFont(latoBold, { subset: true })

  const page = pdfDoc.getPages()[LAYOUT.pageIndex]

  drawOutlinedCenteredAutoFit(page, {
    otFont: otBold,
    text: fullName,
    centerX: LAYOUT.name.centerX ?? page.getWidth() / 2,
    centerY: LAYOUT.name.centerY,
    sizeMax: LAYOUT.name.sizeMax,
    minSize: LAYOUT.name.minSize,
    color: LAYOUT.color,
    maxWidth: LAYOUT.name.maxWidth,
  })

  const dateStr = formatDate(date)
  drawOutlinedCenteredText(page, {
    otFont: otRegular,
    text: dateStr,
    centerX: LAYOUT.date.centerX,
    centerY: LAYOUT.date.centerY,
    size: LAYOUT.date.size,
    color: LAYOUT.color,
  })

  const bytes = await pdfDoc.save()

  if (outPath) {
    await fs.mkdir(path.dirname(outPath), { recursive: true })
    await fs.writeFile(outPath, bytes)
  }
  return bytes
}
module.exports = { generateCertificate, LAYOUT }🧑💻 4. Command-line usage (cli.js)
The CLI script lets you generate a certificate directly from the terminal.
📍 Create src/cli.js and paste the full code below:
const path = require('path')
const { generateCertificate } = require('./generateCertificate')

async function main() {
  const [, , fullNameArg, dateArg] = process.argv
  if (!fullNameArg) {
    console.error('Usage: node src/cli.js "Full Name" [YYYY-MM-DD]')
    process.exit(1)
  }
  const outName = `certificate-${fullNameArg.replace(/\s+/g, '_')}.pdf`
  const outPath = path.join(__dirname, '..', 'output', outName)

  const bytes = await generateCertificate({
    fullName: fullNameArg,
    date: dateArg || new Date(),
    outPath,
  })

  console.log(`Saved: ${outPath} (${bytes.length} bytes)`)
}

main().catch((e) => {
  console.error(e)
  process.exit(1)
})
Now you can run:
node src/cli.js "John Doe" 2025-10-15You’ll find your generated PDF in /output.
🌐 5. Exposing an HTTP API (server.js)
Let’s make it available as a simple REST endpoint.
📍 Create src/server.js and paste the following:
const http = require('http')
const { generateCertificate } = require('./generateCertificate')

const server = http.createServer(async (req, res) => {
  if (req.method === 'POST' && req.url === '/certificates') {
    let body = ''
    req.on('data', (chunk) => (body += chunk))
    req.on('end', async () => {
      try {
        const data = JSON.parse(body || '{}')
        const fullName = (data.fullName || '').trim()
        if (!fullName) {
          res.writeHead(400, { 'Content-Type': 'application/json' })
          return res.end(JSON.stringify({ error: 'fullName is required' }))
        }
        const pdfBytes = await generateCertificate({
          fullName,
          date: data.date,
        })

        res.writeHead(200, {
          'Content-Type': 'application/pdf',
          'Content-Disposition': 'inline; filename="certificate.pdf"',
        })
        return res.end(Buffer.from(pdfBytes))
      } catch (err) {
        res.writeHead(500, { 'Content-Type': 'application/json' })
        return res.end(JSON.stringify({ error: 'Generation failed' }))
      }
    })
  } else {
    res.writeHead(404, { 'Content-Type': 'application/json' })
    res.end(JSON.stringify({ error: 'Not found' }))
  }
})

const PORT = process.env.PORT || 3000
server.listen(PORT, () => {
  console.log(`API listening on http://localhost:${PORT}`)
})
You can test it using curl:
curl -X POST http://localhost:3000/certificates -H "Content-Type: application/json" -d '{"fullName":"Jane Doe","date":"2025-10-13"}' --output cert.pdf🧠 6. Understanding how it all works
Let’s recap the flow:
- The PDF template is loaded from
assets/template.pdf. - Lato Regular and Bold fonts are parsed using opentype.js.
- The text (name/date) is converted into vector paths and drawn directly on the PDF canvas.
- The final PDF is saved either through the CLI or returned by the API.
This makes the process:
- Fast (assets cached in memory)
- Reliable (no font embedding issues)
- Beautiful (thanks to the Lato font by Polish designer Łukasz Dziedzic)
✨ 7. About the Lato font
The Lato typeface, designed by Polish typographer Łukasz Dziedzic, is known for its elegant balance of clarity and warmth.
Using it in certificates gives your PDFs a clean, professional feel - while keeping text easy to read even in print.
🚀 8. Scaling up with queues and background workers
When you need to generate hundreds or thousands of certificates, running everything in a single Node.js process quickly becomes inefficient.
Each PDF generation involves:
- Loading fonts and templates into memory,
- Rendering vector paths,
- And writing or returning binary data.
These tasks are CPU-intensive and can easily block the main thread if handled synchronously through an HTTP API.
That’s where asynchronous job queues and background workers come in.
🧭 The problem: synchronous generation doesn’t scale
Imagine you’re issuing certificates for an online course with 20,000 graduates.
If your /certificates API endpoint tries to generate all PDFs immediately upon request, you’ll run into:
- ⏱️ Slow responses - each PDF takes time to render.
- 🚫 Timeouts - browsers and proxies often limit requests to 30 seconds.
- 🧠 Memory spikes - multiple concurrent generations can exhaust your server’s RAM.
Instead of generating in real time, you can enqueue certificate generation jobs and process them asynchronously.
⚙️ The scalable architecture
A scalable setup usually looks like this:
- API Layer – receives requests (e.g., list of users to generate certificates for).
It validates input and pushes jobs into a message queue. - Queue (RabbitMQ / BullMQ / Redis) – acts as a buffer and ensures reliable delivery.
Each message represents one generation task, e.g.{ fullName, date, courseId }. - Worker Service – consumes jobs from the queue, generates PDFs using your existing
generateCertificate()function, and uploads them to storage. - File Storage (AWS S3, DigitalOcean Spaces, or local) – stores the generated PDFs.
- Database (PostgreSQL / MongoDB) – tracks job status, URLs to finished files, and metadata.
- Notification Layer (optional) – once the file is ready, notifies the user via email or webhook.
🧩 Example: job flow step-by-step
- User submits a batch request →
POST /api/certificates/bulk - The API pushes each record to RabbitMQ as a message.
- Worker service listens for new messages:
- Downloads the base
template.pdf - Calls
generateCertificate() - Uploads the result to S3
- Updates the database record (
status = "completed",fileUrl = ...)
- Downloads the base
- The user can then download their certificate via a public endpoint.
🧱 Why RabbitMQ (or BullMQ)?
Both are mature queue systems used in Node.js environments.
- 🐇 RabbitMQ is great for distributed systems - persistent, durable, supports multiple consumers.
- 🧱 BullMQ (built on top of Redis) is simpler to set up and well integrated with Node.js ecosystem.
For high throughput and reliability, RabbitMQ is usually preferred.
For simpler projects, BullMQ or even a Redis-based queue is perfectly fine.
🧰 Example worker setup (conceptual)
import { Worker, Queue } from 'bullmq'
import { generateCertificate } from './generateCertificate.js'
import { uploadToS3 } from './upload.js'

const queue = new Queue('certificates')

new Worker('certificates', async (job) => {
  const pdf = await generateCertificate(job.data)
  const fileUrl = await uploadToS3(pdf, job.data.fullName)
  // Update DB with fileUrl and status = 'done'
})
This worker runs independently of your API, consuming tasks and processing them one by one (or in batches).
🗺️ Example architecture diagram
The following diagram illustrates the complete flow of asynchronous generation:
This diagram shows the end-to-end pipeline:
incoming API → queue → background worker → PDF generation → S3 upload → final record in DB.
🧠 Best practices for large-scale generation
Here are some production-level recommendations:
- Preload assets (fonts, templates) in worker memory to avoid disk I/O on every job.
- Use idempotent job IDs – prevent duplicate generation when messages are retried.
- Separate queues by priority – e.g., “urgent” vs. “bulk”.
- Monitor queue health – RabbitMQ Management UI or Bull Board.
- Store only URLs in DB, not the raw PDF binary.
- Use retry policies and dead-letter queues for failed jobs.
- Compress and cache generated PDFs if they are reused often.
💬 Summary
By decoupling your generation process from the main API and moving it into background workers, you gain:
- 🏃♂️ Higher throughput
- 🧘♀️ Smoother user experience
- 💾 Better resource control
- 💪 Reliability under load
This architecture transforms your simple Node.js generator into a production-ready document generation service - scalable, resilient, and cost-efficient.
✅ 9. Wrap-up
You’ve just built a fully functional PDF certificate and voucher generator in Node.js.
You can easily extend it with QR codes, unique serial numbers, or even digital signatures.
This project combines performance, precision, and elegance - and can scale from a single certificate to a production-grade document pipeline.
Happy coding - and congratulations, you’ve just automated recognition!
Related articles
Secure your application using CSRF Tokens. Create CSRF Library in PHP
Protect forms and JSON endpoints with session-based, one-time CSRF tokens in PHP. Threat model, design decisions, and a clean class you can drop into any app.
Real-Time WebP Converter in Python for developers
Automatically monitor a folder and convert new images to WebP in real time using Python's Watchdog and cwebp.
Implementing Custom Events in Astro with GTM & Partytown (Step-by-Step)
Track custom events in Astro the right way-emit events, route them through Partytown, and map DLVs in Google Tag Manager.